Building Your User Client
Adding Core Functionality
Most of the work here will be configuring and adding functionality to src/index.ts file, allowing you to establish and handle the websocket connection to your local Nym client, and create and send messages to the SP.
- Replace the existing content of
src/index.tswith:
async function main() {}

function connectWebsocket(url) {
    return new Promise(function (resolve, reject) {
        var server = new WebSocket(url);
        console.log('connecting to Websocket Server (Nym Client)...')
        server.onopen = function () {
            resolve(server);
        };
        server.onerror = function (err) {
            reject(err);
        };

    });
}

main();
main() will the majority of the app’s logic. It’s best to declare it at the start of the file and call it at the end to run when launching the application.
connectWebsocket(url) returns a Promise that attempts to create a websocket connection to url. If the connection is successful, you will get a notification in your running application in the browser, as well as the connected Nym client. If it fails an error will be displayed in the browser.
- Now to implement the functions that will handle DOM (Document Object Model) manipulation. Add the following below
connectWebsocket():
function handleResponse(resp) {
    try {
        let response = JSON.parse(resp.data);
        if (response.type == "error") {
            displayJsonResponse("Server responded with error: " + response.message);
        } else if (response.type == "selfAddress") {
            ourAddress = response.address;
            displayClientMessage("Our address is:  " + ourAddress + ", we will now send messages to ourself.");
        } else if (response.type == "received") {
            handleReceivedTextMessage(response)
        }
    } catch (_) {
            displayJsonResponse(resp.data)
    }
}

function handleReceivedTextMessage(message) {
    const text = JSON.parse(message.message);
    displayJsonResponse(text);
}

// Display websocket responses in the Activity Log.
function displayJsonResponse(message) {
    let receivedDiv = document.createElement("div")
    let paragraph = document.createElement("p")
    paragraph.setAttribute('style', 'color: orange')
    let textNode = document.createTextNode("received >>> " + message.text)
    paragraph.appendChild(textNode)

    receivedDiv.appendChild(paragraph)
    document.getElementById("output").appendChild(receivedDiv)
}

function displayClientMessage(message) {
    document.getElementById("output").innerHTML += "<p>" + message + "</p >";
}
handleResponse() parses the type of any messages received from the websocket, and handles forwarding the message on to the appropriate function depending on this type. You can find documentation on these types here.
handleReceivedTextMessage() ensures that data is json data before displaying on the UI.
displayJsonResponse() is responsible for displaying received messages on the UI, creating a new <p> HTML element for each message that needs to be displayed on screen.
displayClientMessage() displays the address of the connected Nym client.
- Declare the following variables above
main()
var ourAddress:          string;
var targetAddress:       string;
var websocketConnection: any;
ourAddress takes the value of the connected Nym client address.
targetAddress will be the Nym address of the SP.
websocketConnection populated upon a successful response from connectWebsocket().
- Add the following to
main():
async function main() {
    var port = '1977' // Nym Websocket Client listens on 1977 by default.
    var localClientUrl = "ws://127.0.0.1:" + port;

    // Set up and handle websocket connection to our desktop client.
    websocketConnection = await connectWebsocket(localClientUrl).then(function (c) {
        return c;
    }).catch(function (err) {
        displayClientMessage("Websocket connection error. Is the client running with <pre>--connection-type WebSocket</pre> on port " + port + "?");
    })

    websocketConnection.onmessage = function (e) {
        handleResponse(e);
    };

    sendSelfAddressRequest();

    // Set up the send button
    const sendButton = document.querySelector('#send-button');

    sendButton?.addEventListener('click', function handleClick(event) {
        sendMessageToMixnet();
    });
And between main() and displayClientMessage():
function sendSelfAddressRequest() {
    var selfAddress = {
        type: "selfAddress"
    }
    displayJsonSend(selfAddress);
    websocketConnection.send(JSON.stringify(selfAddress));
}
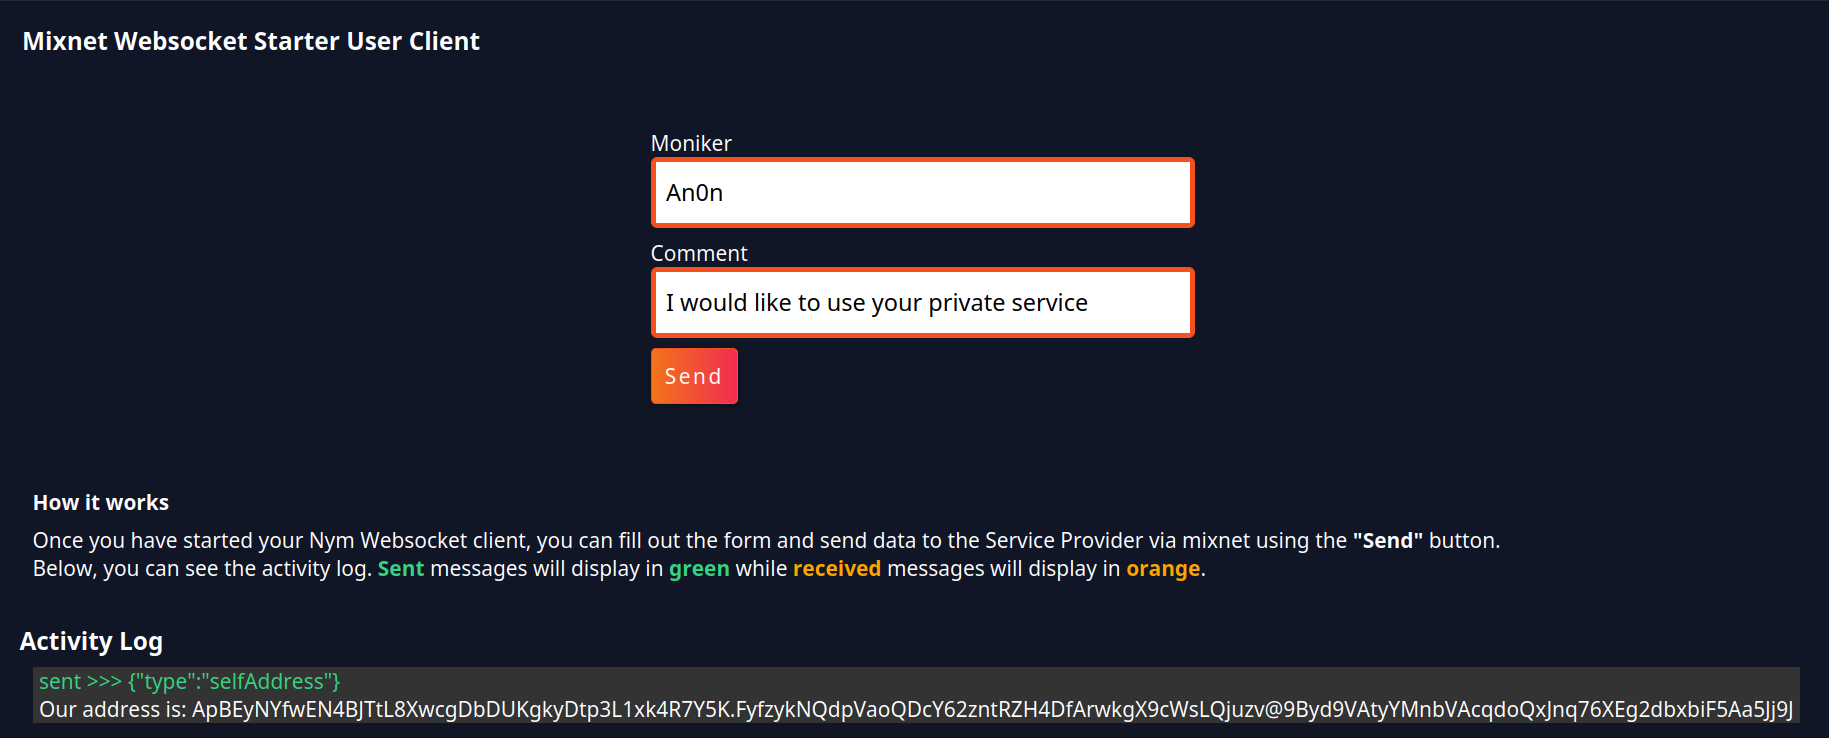
sendSelfAddressRequest() sends a selfAddress message to the connected websocket client, passing the response to displayJsonSend() to be displayed on your UI.
main() now contains logic for: connecting to a local Nym client, getting its address with a selfAddress message, and displaying it on the UI. Now your app can display its connection status, letting you know whether it is(n’t) connected to a running client!
- Underneath
sendSelfAddressRequest()implement a function to send messages down the websocket connection to the SP:
function sendMessageToMixnet() {

    var nameInput = (<HTMLInputElement>document.getElementById("nameInput")).value;
    var textInput = (<HTMLInputElement>document.getElementById("textInput")).value;

    const messageContentToSend = {
        name : nameInput,
        comment : textInput,
    }

    const message = {
        type: "sendAnonymous",
        message: JSON.stringify(messageContentToSend),
        recipient: targetAddress,
        replySurbs: 5
    }

    displayJsonSend(message);
    websocketConnection.send(JSON.stringify(message));
}
Nym clients accept messages in either binary or JSON formats. Since you are sending JSON data, you need to stringify any messages you wish to send through the mixnet.
You are sending replySURBs along with the message to the SP. This allows the SP to reply to you without you having to doxx yourself and supply a ‘return address’ in a readable form to it. TLDR; SURBs allow for anonymous replies from mixnet services!
- Below
sendMessageToMixnet(), add the following:
function displayJsonSend(message) {
    let sendDiv = document.createElement("div")
    let paragraph = document.createElement("p")
    paragraph.setAttribute('style', 'color: #36d481')
    let paragraphContent = document.createTextNode("sent >>> " + JSON.stringify(message))
    paragraph.appendChild(paragraphContent)

    sendDiv.appendChild(paragraph)
    document.getElementById("output").appendChild(sendDiv)
}
displayJsonSend() displays sent messages in the “Activity Log” section of the UI.
- Replace the contents of
src/index.htmlwith the following:
<!doctype html>
<html>
    <head>
        <meta charset="UTF-8">
        <title>Mixnet Websocket Starter Client</title>
        <link rel="stylesheet" href="../assets/styles.css"/>
    </head>
    <body>
        <div class="content" role="main">
            <div class="toolbar">
                <h3>Mixnet Websocket Starter User Client</h3>
            </div>

            <div class="section-container">

                <label for="nameInput" class="form-field-label">Moniker</label>
                <input id="nameInput" type="text" value="An0n" name="nameInput">

                <label for="textInput" class="form-field-label">Comment</label>
                <input id="textInput" type="text" value="I would like to use your private service" name="textInput">

                <div id="send-button">
                    <label for="send-button" class="submit-button">Send</label>
                </div>
            </div>
        </div>

        <div class="" style="margin-left:20px;max-width: fit-content;">
            <div style="color: white;margin-bottom: 2rem;">
                <h4>How it works</h4>
                <p>Once you have started your Nym Websocket client, you can fill out the form and send data to the Service Provider via mixnet using the <b>"Send"</b> button.</p>
                <p>Below, you can see the activity log. <b style='color: #36d481;'>Sent</b> messages will display in <b style='color: #36d481;'>green</b> while <b style='color: orange;'>received</b> messages will display in <b style='color: orange;'>orange</b>.</p>
            </div>
        </div>

        <h3 style="margin-left:10px">Activity Log</h3>

        <p class="output-container">
            <span id="output"></div>
        </p>
        <script src="index.ts"></script>
    </body>
</html>
Lets add the finishing touches to the UI by adding in the stylesheet which we specified at the top of index.html:
mkdir -p assets
touch assets/styles.css

# grab the stylesheet from the remote repo and save it to the newly created css file
curl https://raw.githubusercontent.com/nymtech/developer-tutorials/main/simple-service-provider-tutorial/user-client/assets/styles.css -o assets/styles.css
- Return back to your terminal and run:
npm start
Return to localhost:1234) and you should see an updated UI.
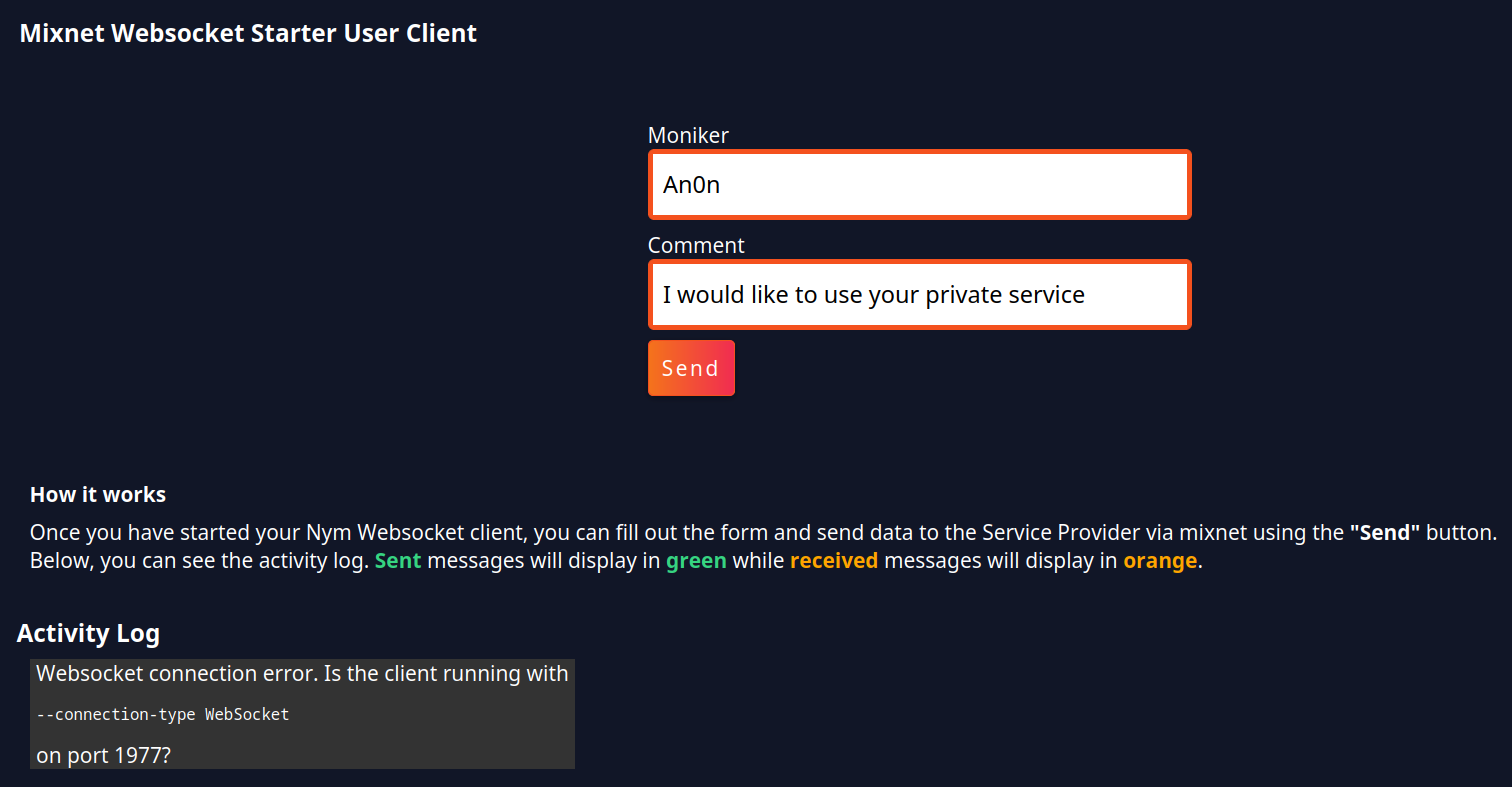
Connecting to your Nym Client
Follow instructions in the Nym websocket client documentationto init and run a client then refresh your browser window. You should see a successful response, including a Nym address, in the ‘Activity Log’ of the UI
Your User Client application code is connected to a Nym websocket client, and ready to send messages through the mixnet!
In the next section, you will build the Service application you will send these messages to.